Cake Recipes

5-Minute Ice Tray Cheesecake Bites!

Scroll to recipe
This website contains affiliate links. Some products are gifted by the brand to test. As an Amazon Associate, I earn from qualifying purchases.  

You know those days where everything just feels like a lot? Yeah, it was one of those Wednesdays. Not like full-blown meltdown mode but more like this low-key simmering chaos. It was 90 degrees inside the house, my kitchen looked like it lost a food fight, and somehow, I still wanted dessert. Like… why?

You know the vibe.

Anyway, I opened the fridge, stood there for a good five minutes like it owed me something, and realized I had cream cheese… leftover graham crackers… and the tiniest bit of yogurt. Light bulb moment. I wasn’t about to turn on the oven, that’s for sure. But I also wasn’t in the mood for a sad spoonful of peanut butter pretending to be dessert.

5-Minute Ice Tray Cheesecake Bites

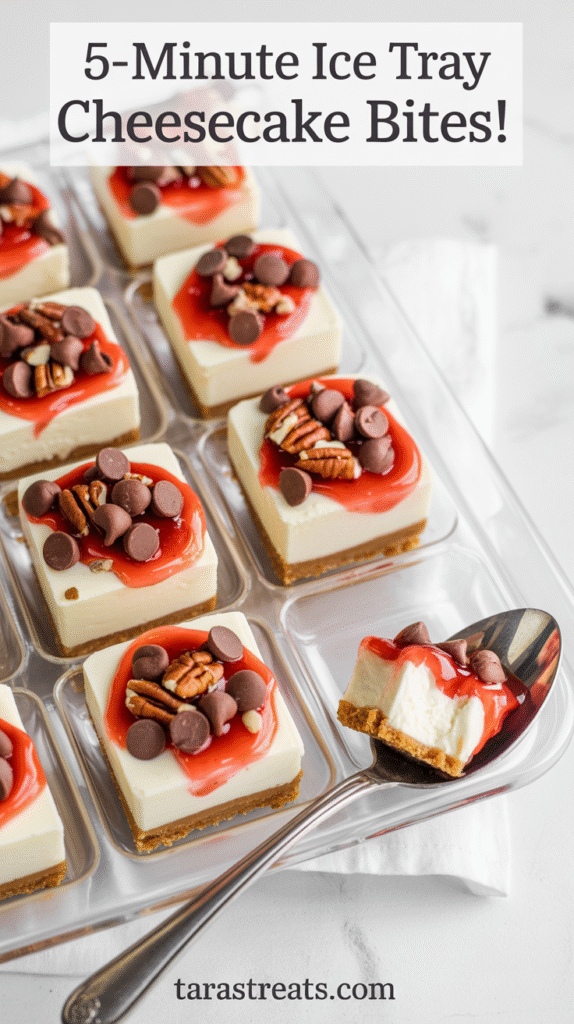
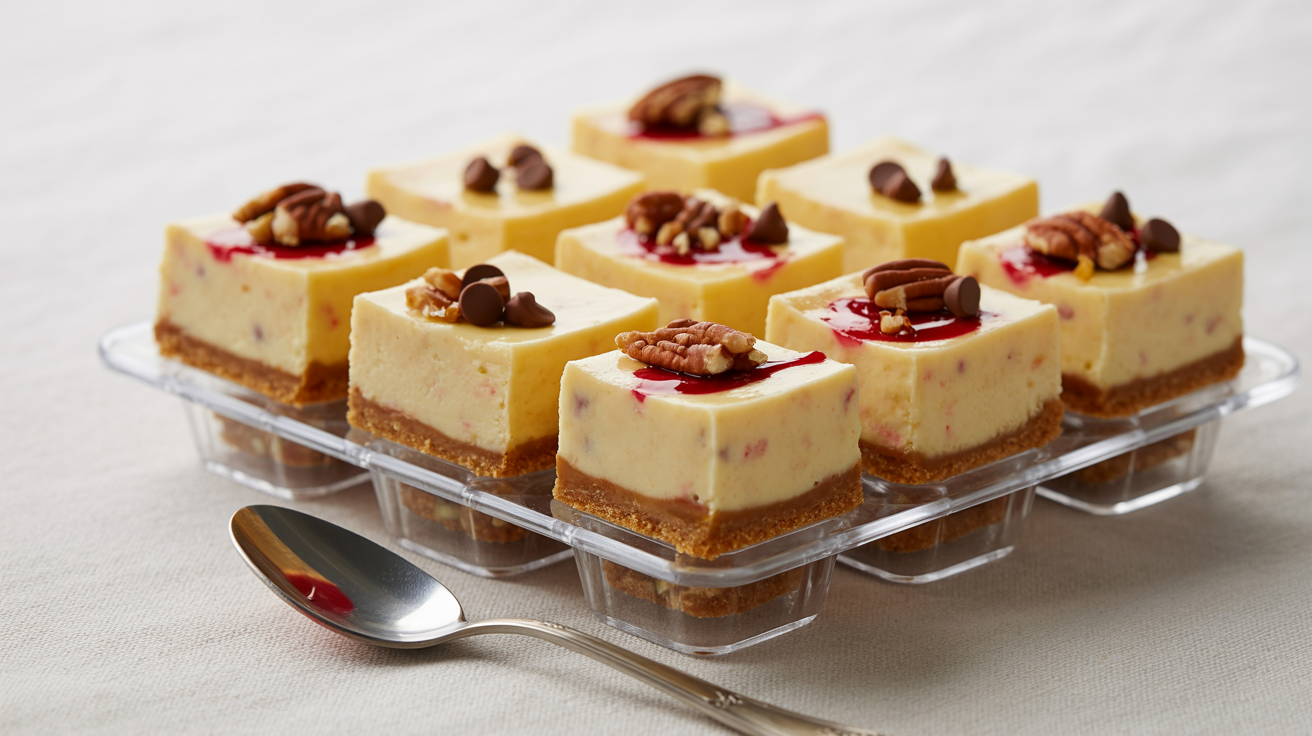
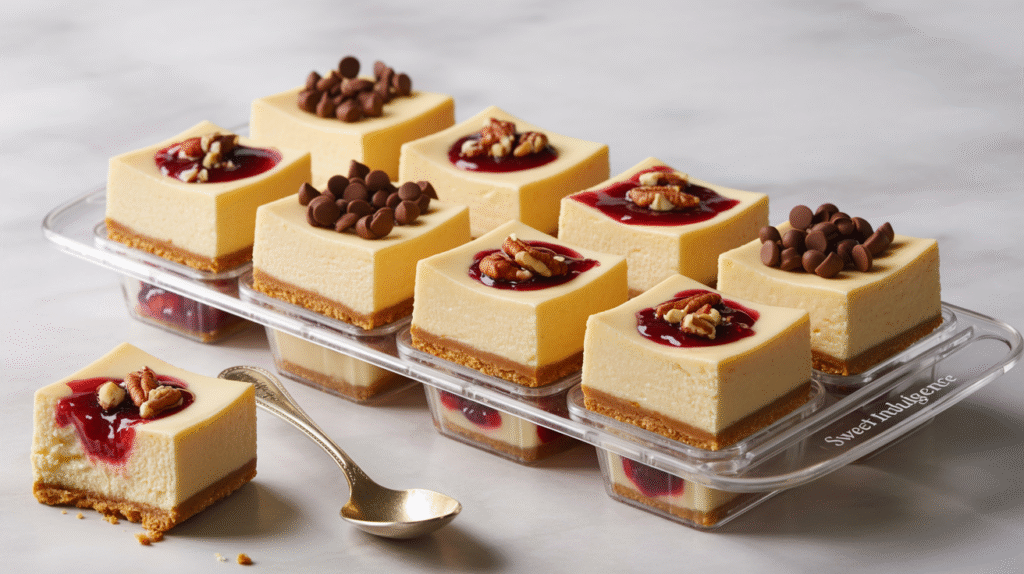
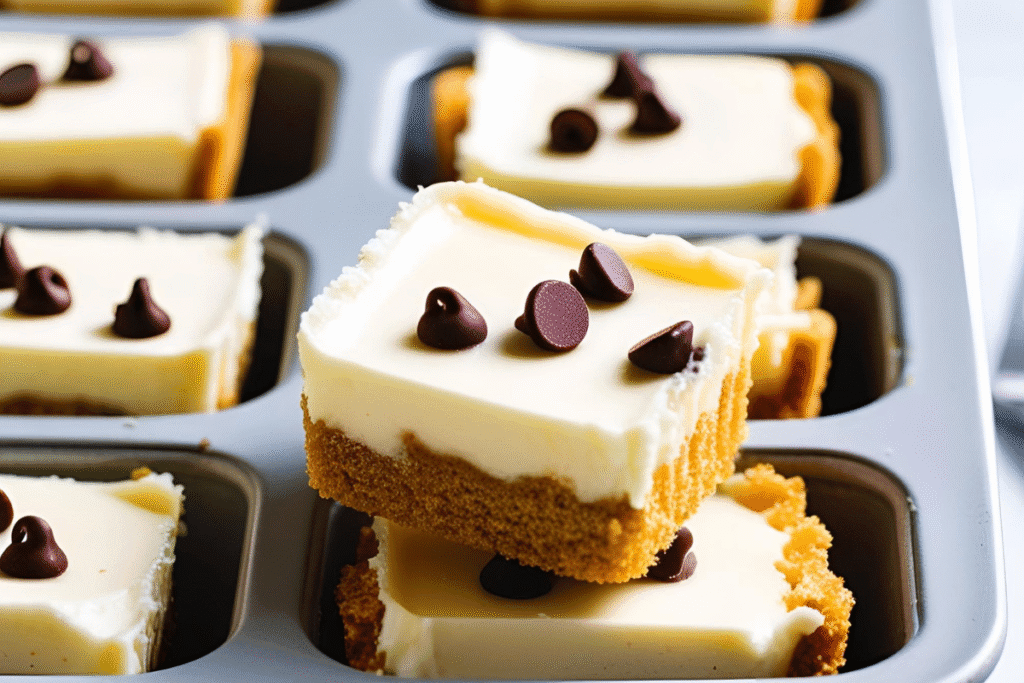
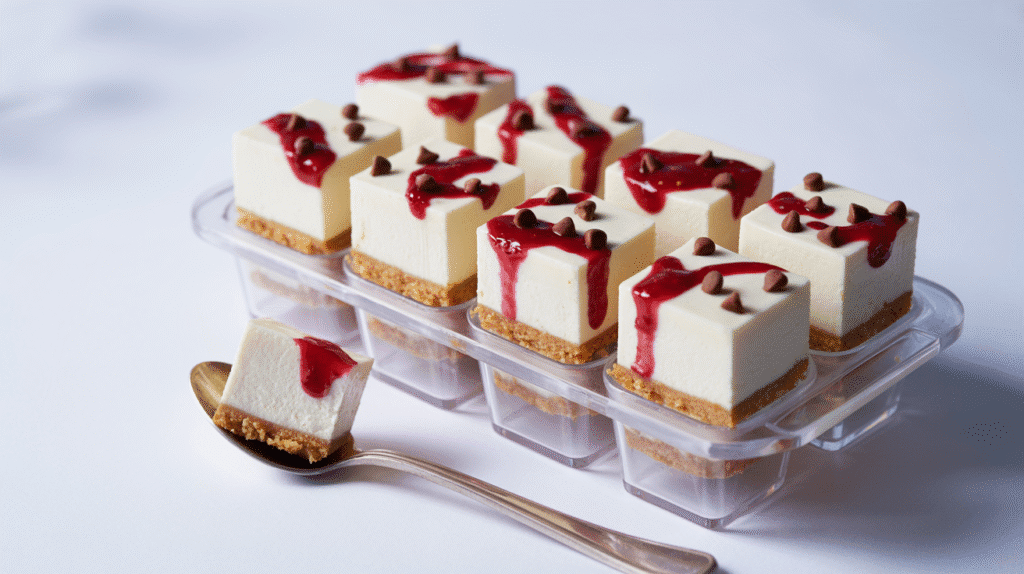
That’s when it hit me – mini no-bake cheesecakes. But make them fun. Bite-sized. Something you can pop in your mouth straight from the freezer like a sweet little serotonin boost. And guess what? Ice cube tray to the rescue. I honestly didn’t expect them to be this good, but oh wow… I ended up making three more batches by the weekend. And now you get the magic too.


💖 Why These Lil’ Cheesecake Cubes Deserve a Spot in Your Freezer

💤 No Oven, No Problem

You could literally make these half-asleep. Mix, press, freeze. That’s it.

🍽 Leftovers? Where?

They’re single-serve, freezer-friendly, and ready when you are. No more “oops, I ate half a cheesecake” moments.

✨ They’re Cute-Cute

Ice cube trays = perfect little dessert molds. Guests will assume you’ve taken a class. Let them.

cheesecake bites

🛠 DIY Dessert Mood

Jam? Yes. Chocolate chips? Double yes. Peanut butter swirl? Chef’s kiss. Make them yours.

👶 Kid-Tested, Adult-Devoured

These bars – totally kid-approved and mysteriously vanish when adults are around too. Even the picky aunt couldn’t resist. Basically, they’re a hit with everyone.

🧘🏽‍♀️ Dessert Without the Crash

Lighten up with Greek yogurt and less sugar, and you’ve got a treat that doesn’t wreck your vibe.


🛒 What’s in the Magic Mix? (Ingredients)

Ice Tray Cheesecake Bites Ingredients
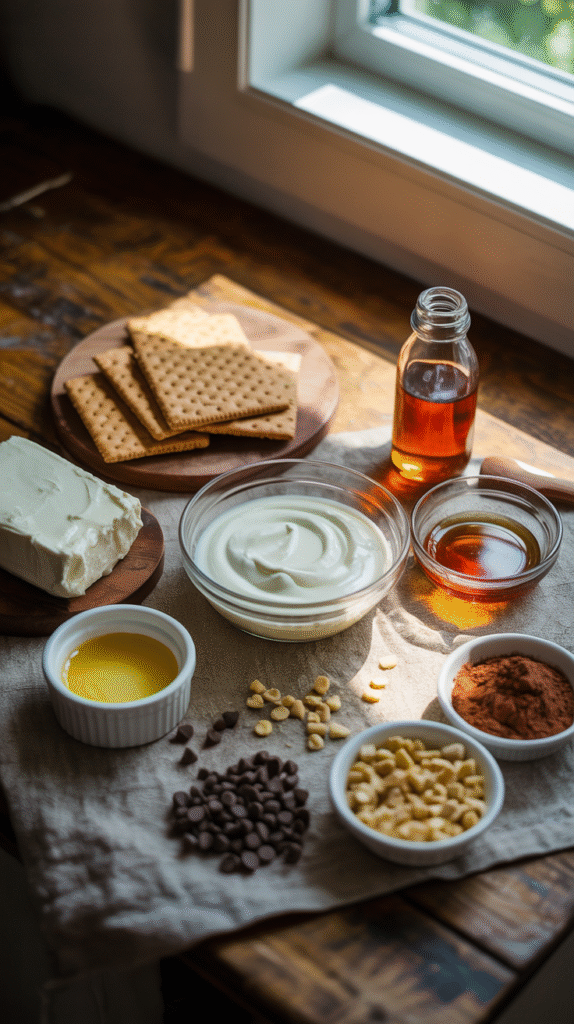
  • Cream cheese – 1 block (8 oz), softened
  • Greek yogurt – ½ cup (plain or vanilla)
  • Honey or maple syrup – 2-3 tbsp
  • Vanilla extract – 1 teaspoon
  • Crushed graham crackers – ½ cup
  • Butter – 2 tablespoons, melted
  • Optional toppings: mini chocolate chips, fruit preserves, chopped nuts, cocoa powder

💡 Variations to try:

  • Swap Greek yogurt with sour cream for a tangier bite.
  • Use crushed Oreos or gingersnaps instead of graham crackers.
  • Add lemon zest for a refreshing zing.
  • Use toppings like frozen berries or a swirl of peanut butter. Maybe both. No rules here.

🧰 Equipment You’ll Need

  • Ice cube tray (prefer silicone for easy popping)
  • Mixing bowl
  • Electric mixer or whisk
  • Spoon or mini spatula
  • Freezer

🧁 Step-by-Step: Cube It Like You Mean It

quick frozen treats

Step 1: Crust First, Always

Grab a small bowl and mix your crushed graham crackers with melted butter. You’re for that “damp brown sugar” texture. Then, press about a teaspoon of the mix into each slot of your ice cube tray. Boom – mini crusts done.

Step 2: Whip the Filling

Toss your softened cream cheese, Greek yogurt, honey (or maple syrup), and vanilla into a mixing bowl. Now whip it until you get a smooth, creamy, no-lumps consistency. This is your dreamy cheesecake base.

Step 3: Fill the Tray

Alright, time to fill ‘em up! Spoon that creamy cheesecake mixture right over the crusts in your ice cube tray. Just don’t go overboard; leave a little space at the top so they don’t get puffy in a weird way inside the freezer. Smooth out the tops using the back of a spoon.

mini cheesecake recipe

Step 4: Add the Toppings (Optional but Recommended)

Sprinkle chocolate chips, swirl in some jam, or go crazy with chopped nuts. Whatever floats your cheesecake boat.

Step 5: Freeze and Forget (For a Bit)

Pop the tray into the freezer and forget about it for at least 2 hours. When they’re firm, push them out gently (this is where silicone trays are lifesavers).

ice tray desserts

🔢 Nutrition Info (Per Bite, Approximate)

This will vary slightly based on ingredients used and toppings added.

  • Calories: 90
  • Protein: 2g
  • Carbs: 5g
  • Sugar: 3g
  • Fat: 7g
  • Fiber: 0.3g

Tip: See? Not terrible for a dessert you want to eat at 11 PM. If you use low-fat cream cheese and unsweetened yogurt, the numbers will lean even lighter.(See? Not terrible for a dessert you want to eat at 11 PM.)


❓ Mini Q&A: Because You Might Be Wondering

cheesecake bites

Q: Can I make this dairy-free?
Totally. Just swap in dairy-free cream cheese and coconut yogurt. It still turns out creamy, tangy, and delicious. No one will know the difference.

Q: How many days will it survive in the freezer?
About 2-3 weeks. But good luck keeping them that long. Mine disappeared within days.

Q: Can I make this in a mini muffin tin instead of an ice tray?
Yep! Just line it with mini cupcake liners for easy removal.

Q: What if I don’t have graham crackers?
Use any kind of cookie or even granola. Just make sure it’s crushed and buttery.

Q: Are these good for kids?
Absolutely! They’re perfectly snack-sized for little hands. You might want to tone down the sweetener a bit if your kiddo isn’t big on sweets but otherwise, a total win.


This website contains affiliate links. Some products are gifted by the brand to test. As an Amazon Associate, I earn from qualifying purchases.  
Share
5-Minute Ice Tray Cheesecake Bites!

5-Minute Ice Tray Cheesecake Bites!

qmakers111gmail-com
These no-bake Ice Tray Cheesecake Bites are the perfect quick dessert when you're craving something creamy, cold, and satisfying. Made with cream cheese, Greek yogurt, and just a touch of natural sweetener, they’re light, customizable, and totally freezer-friendly. You’ll use an ice cube tray for easy portioning; no oven, no fuss. Top with jam, chocolate chips, or crushed nuts for a fun, bite-sized treat that hits the spot.
prep time
5 min
cooking time
0 min (Freeze Time: 2–3 hours)
servings
About 12 bites
total time
3 hours (hands-on time: 5 min)

Equipment

  • Ice cube tray (prefer silicone)

  • Mixing bowl

  • Electric mixer or whisk

  • Spoon or mini spatula

  • Freezer

Ingredients

  • 1 block (8 oz) cream cheese, softened

  • ½ cup plain/vanilla Greek yogurt

  • 2–3 tbsp honey or maple syrup

  • 1 tsp vanilla extract

  • ½ cup crushed graham crackers

  • 2 tbsp melted butter


  • Optional for topping:

  • mini chocolate chips

  • fruit preserves,

  • chopped nuts,

  • cocoa powder

Instructions

1

Crust First, Always

Grab a small bowl and mix your crushed graham crackers with melted butter. You’re for that “damp brown sugar” texture. Then, press about a teaspoon of the mix into each slot of your ice cube tray. Boom - mini crusts done.
2

Whip the Filling

Toss your softened cream cheese, Greek yogurt, honey (or maple syrup), and vanilla into a mixing bowl. Now whip it until you get a smooth, creamy, no-lumps consistency. This is your dreamy cheesecake base.
3

Fill the Tray

Alright, time to fill ‘em up! Spoon that creamy cheesecake mixture right over the crusts in your ice cube tray. Just don’t go overboard; leave a little space at the top so they don’t get puffy in a weird way inside the freezer. Smooth out the tops using the back of a spoon.
4

Add the Toppings (Optional but Recommended)

Sprinkle chocolate chips, swirl in some jam, or go crazy with chopped nuts. Whatever floats your cheesecake boat.
5

Freeze and Forget (For a Bit)

Pop the tray into the freezer and forget about it for at least 2 hours. When they’re firm, push them out gently (this is where silicone trays are lifesavers).

Notes

Let it Chill… Out of the Fridge. Don’t skip this: soften your cream cheese all the way. Cold cream cheese = lumpy filling. Just let it hang out on the counter for about 30 minutes. Trust the process.

Don’t overfill. They expand slightly in the freezer. Leave a tiny space on top.

Use silicone trays. Trust me. You don’t want to play tug-of-war with frozen cheesecake.

Add flavor boosts. A pinch of cinnamon, some citrus zest, or a drizzle of Nutella goes a long way.

Store smart. Once frozen, pop them out and store in a zip bag or container for grab-and-go desserts anytime.

🎉 The Sweet Wrap-Up

I know it sounds dramatic, but these little cheesecake bites seriously earned their spot in my freezer. They're low-effort, high-reward—just creamy enough, just sweet enough, and small enough that you don’t feel like you’ve committed to a full dessert situation. It’s like a grown-up snack hack that actually feels a little fancy.

I’ve served them at birthday parties, brought them to potlucks, and even eaten one straight out of the freezer with a spoon at 11 PM (no shame here). And now, they’re yours too.

Give these a try and let me know how you remix them—I’m always here for a good dessert glow-up. Whether your day’s been “meh” or you just need a little win in frozen form, these bites hit the spot. Cold, creamy, and customizable? Yes, please.

And hey, if you mess it up a little the first time... just call it rustic. Works every time.

Want more easy, delicious chaos in your kitchen? Stick around. I've got plenty to share with you.

Got questions? Just drop them in the comments or shoot me a message. I’m here for all your cheesecake emergencies.

Happy snacking. 🧊💛🍰

You may also like
Cake Recipes

3-Ingredient Easy Mug Cake Microwave Recipe!

Craving something sweet and fast? This 3-Ingredient Easy Mug Cake Microwave Recipe is the ultimate quick-fix dessert you can make in minutes with just a mug and a microwave!
Cake Recipes

Quick & Easy Strawberry Shortcake Trifle!

This Quick & Easy Strawberry Shortcake Trifle Recipe is a no-bake, crowd-pleasing dessert layered with sweet strawberries, fluffy cake, and whipped cream.
Cake Recipes

Easy & Simple Strawberry Shortcake Recipe!

This easy and simple strawberry shortcake recipe features fluffy homemade shortcakes, sweet juicy strawberries, and whipped cream — the perfect summer dessert.

Leave a Reply

Your email address will not be published. Required fields are marked *